Optimise headshots for your website and socials in 2 steps
Have you ever hired a professional photographer, then uploaded the files to your socials or website and they’re a blurry hot mess? Why you cry? This blog post is for you. I’m going to do my best to guide you through, explaining it to you like you’re a 5 year old. Cos if you’re like me this is your face when anyone starts talking about megapickles or teraflaps:

Ps I made those words up.
Why do my photos look blurry on socials and my website?
Nothing makes me sadder than photographing someone, we create killer photos together, they upload the photos to their website or socials and they don’t look sharp. I take great pains to deliver the photos to my clients optimised to their sparkly best. I’m a little type A about it. When I resize images in Photoshop I use a complicated three step process to make them look sharp. At each step I sharpen them and resize and repeat three times. It results in the most precise and sharp final image.
Files appear blurry online for two main reasons. Ignoring the obvious (the photo is out of focus), it’s usually either because the file is too small (or too large) for it’s intended use. Or because the social media platform has done a resize on the image because it’s way too large. Think Goldilocks, the file should be just the right size.
Sit tight cos I’m going to have to get a little technical now, cos like most things, the devil is in the detail.
To keep it as simple as possible let’s talk about preparing images for three different uses: social media avatars, full page website hero images and general website images. This topic can get so complex and confusing if you go deep into the rabbit hole. To keep it simple, ignore resolution (72dpi or 300 dpi for example), it kinda doesn’t matter. Web pages will only use 72dpi anyway. I researched this post and the more research I did, the more complex the subject got. There’s so many factors that go into how an image is displayed on the web – colour profile, pixel dimensions, file size (200 megabytes for example), file format… the list goes on and on and on. My brain hurts. These 3 use cases are the main ones most of my clients will need. I’m all about my client’s needs.
Step 1: resize your images.
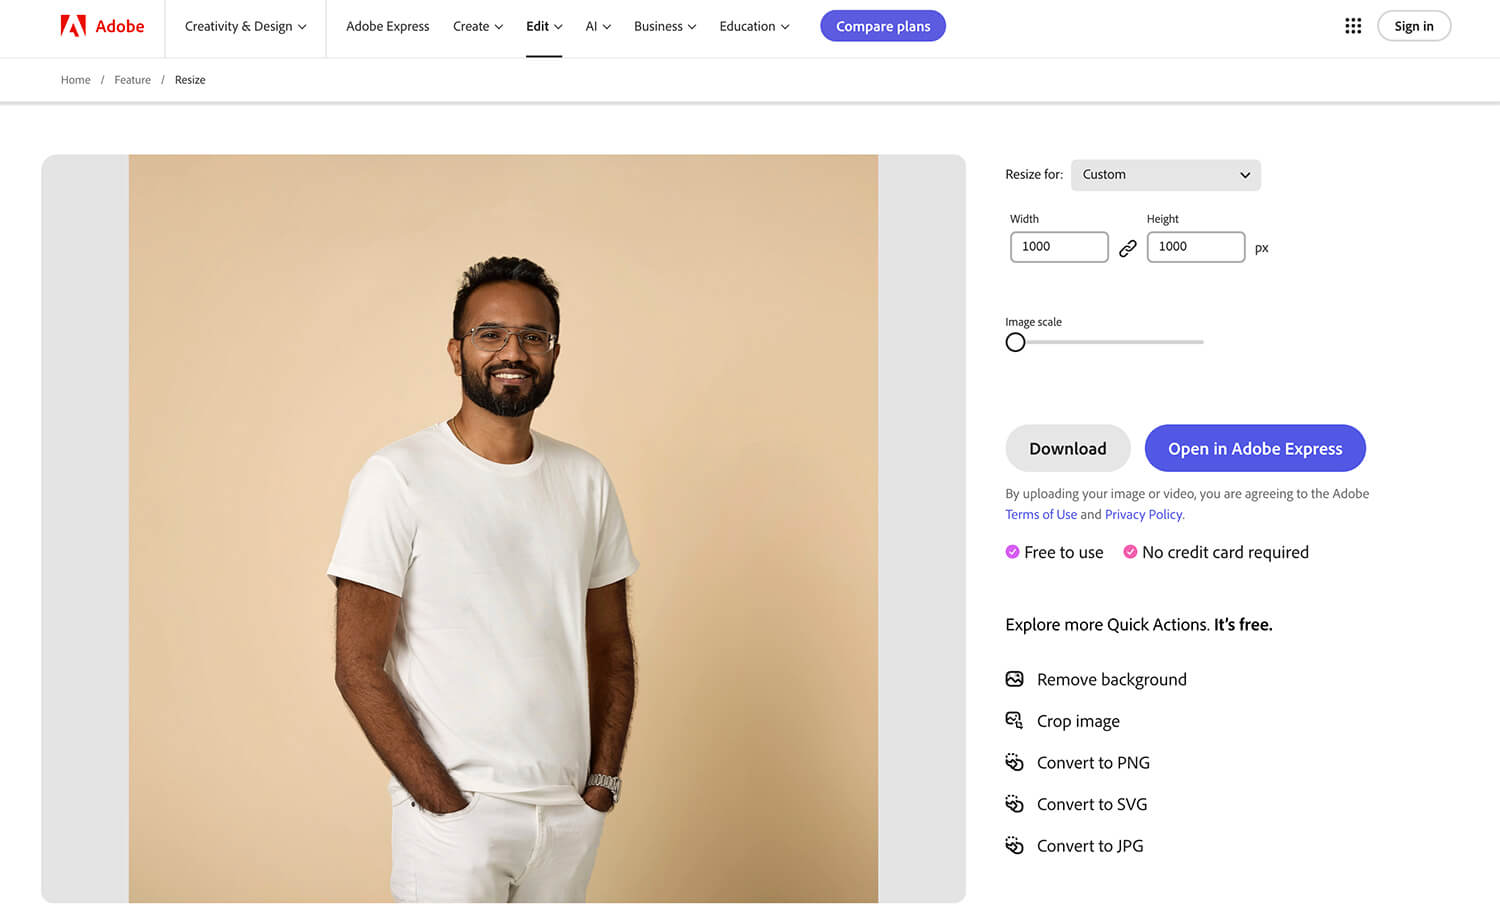
If you don’t have Photoshop, no sweat, Adobe have a free online resizer. If you do have Photoshop and need help, take a deep dive on resizing here.

If you’re optimising for a social media profile pic or avatar, about 1000 pixels on the long edge is about right. You can also crop the image to a square in their re-sizer. Either Jpeg or PNG file format is fine.
If you’re resizing for a full page width website hero image, about 2500-3000 pixels on the long edge is about right. First up, use a Jpeg file format. You can also change file formats in the Adobe resizer. Take a high res image (my camera files are bout 8500 pixels long) and reduce it in size to about 3000-2500 pixels long. Sometimes it will take a bit of experimenting with different sizes to see what the quality looks like. I’m also talking about reducing a large high res photo down to 3000 pixels. Not increasing small image to 3000 pixels because that will look blurry. That might be possible with an AI upscaler but that’s another subject.
Optimising images for online use is always a balancing act between file size and image quality. You should always be aiming for the highest quality image at the lowest file size.
If you’re resizing a photo for an image that might take up half or a quarter of the screen, about 1500 pixels on the long edge is about right. Again, use Jpegs. I deliver two low res versions of headshots to my clients. One is the full crop and is 2300 pixels long and a square crop which is 2000 pixels long. So if you’re my client (hello!) use either of these images to resize. Again, you might need to play around with sizes. Also, if your website only has a few images it’s not super important to optimise every image down to the last megabyte. If your website is image heavy like mine, you’ll need to reduce every file as much as possible.
Step 2: optimise your headshots or images.
Don’t worry about optimising for a social media profile pic. It’s probably overkill. But for your website – absolutely.
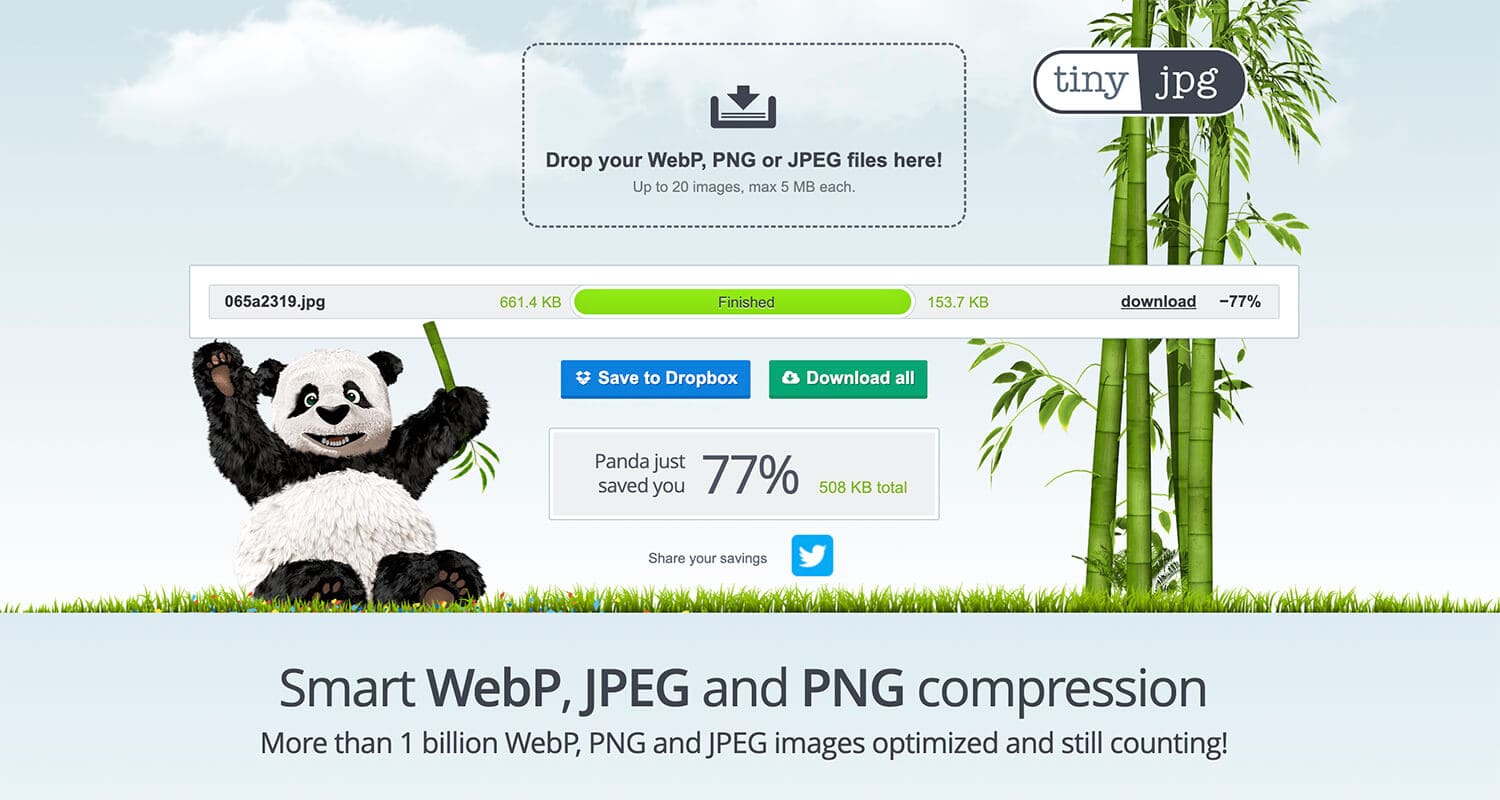
There’s a free online tool I use all the time for my website and blog. It’s called TinyJPG and it’s brilliant for squishing images. Hot SEO tip? Your website images should be reduced to the smallest size possible, especially if your website has 100s of images.

And yes I optimised this image using TinyJPG! It’s super simple to use. Click on the area where it says ‘Drop your WebP,PNG…’ then download. Done.
And that’s it. Remember, if you hired a professional photographer and you’re struggling with any of this, ask them for help. I’m sure they are only too happy to help. Well I know I am.
If you’re in Melbourne and need some new headshots or personal branding images, give us a shout! We’ll elevate your online presence with our personality driven headshots and personal branding imagery.
Published by
Myles Formby is an award winning headshot and personal branding photographer based in Melbourne. He is the founder of Photoform*.
His work is technically precise and full of life. He has developed a reputation for extracting natural performances on camera from anyone.
He has worked as an editorial and fashion photographer and has a deep understanding of colour and lighting.
He's been published in Vogue and worked for national brands like Westfield and JB Hi-Fi.
Copyright Myles Formby Photoform* 2025. All rights reserved. Unauthorised use of images and content is prohibited without prior written permission.
share this post